
NOTE: If you are going to use this guide with production instances is highly recommended to create an image before proceed.
The procedure has been tested using Amazon Linux instances, but should work with any other Linux flavors: Ubuntu, SUSE, Redhat, etc.
Imagine you have one T1 micro PVM instance with next characteristics:
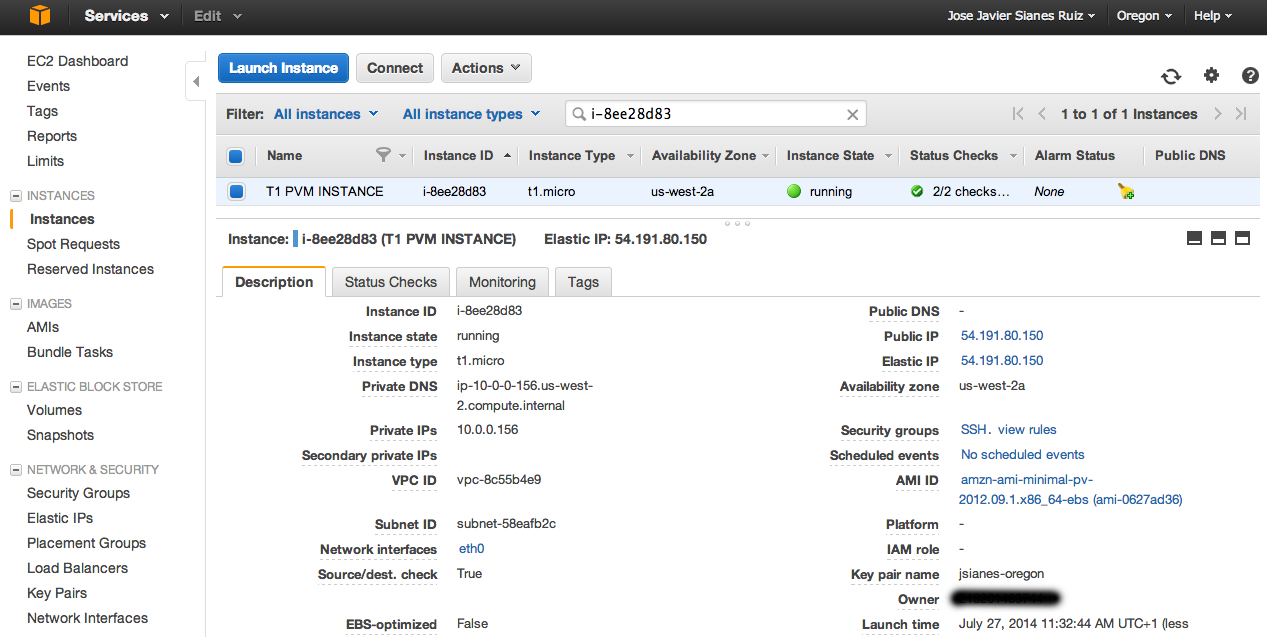
First, login to the instance and ensure is updated. If not, I recommend you to update the instance to the latest stable version using apt-get/yum commands:
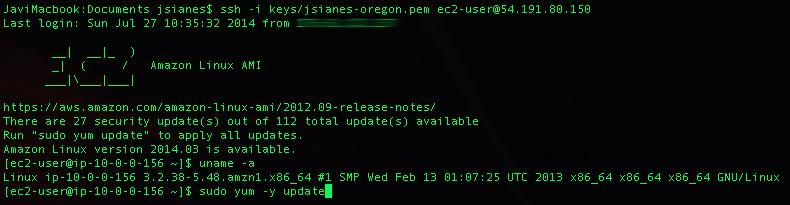
Wait until instance is updated and reboot, if needed. Verify everything is correct. I´m also going to create a file named info.txt just to know this is the root volume associated to my T1 PVM instance:

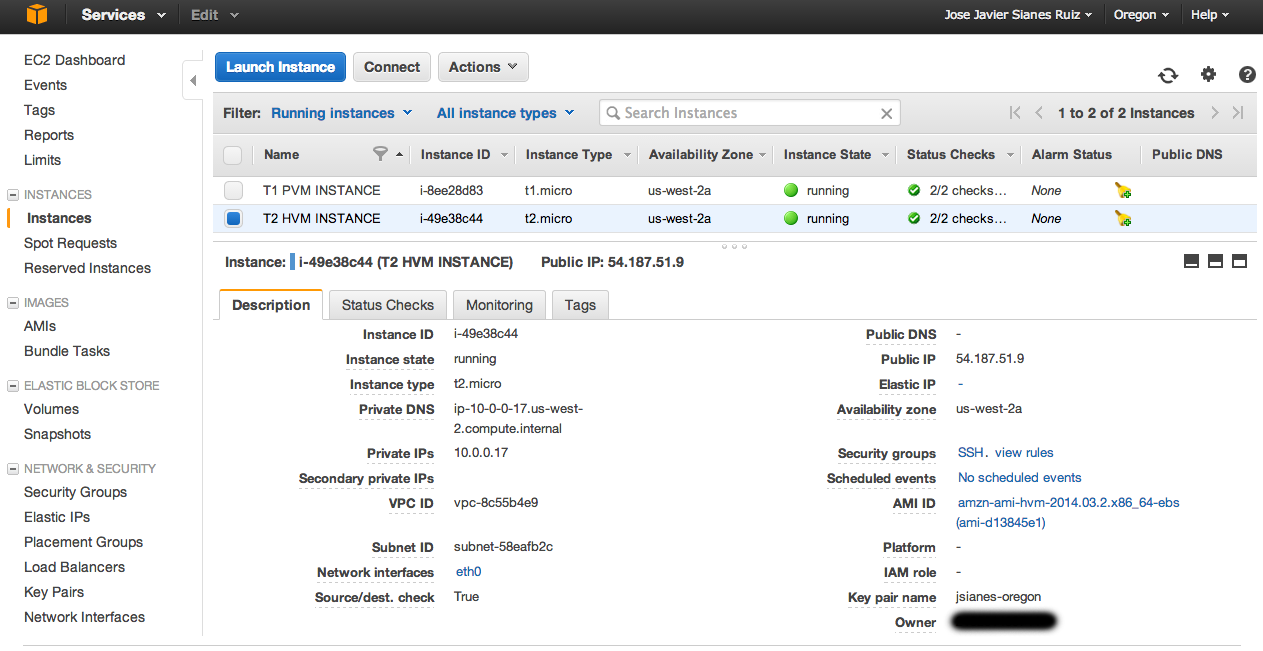
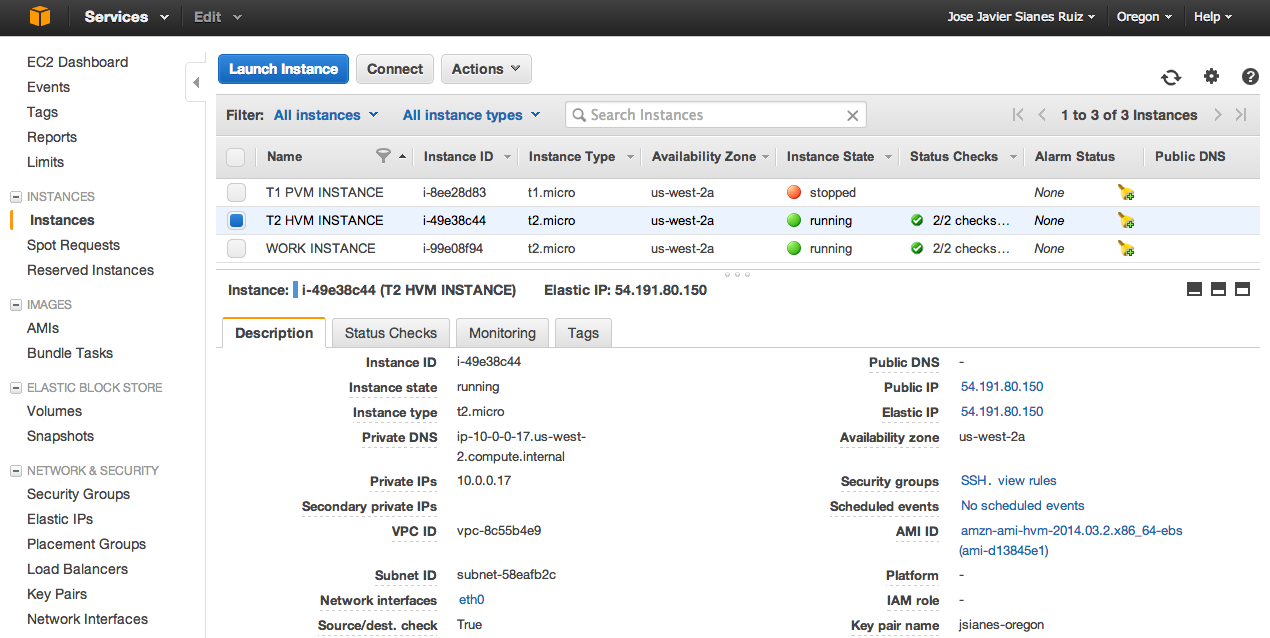
Now, launch a new T2 instance. Don't forget to:
- Select a compatible T2 AMI closer to your current T1 AMI with same architecture (32 or 64bits)
- Select same size for root volume
- Select same instance type (if original T1 instance is t1.micro, select t2.micro)
- Launch T2 instance in the same availability zone (AZ) of your current T1 instance
Example:
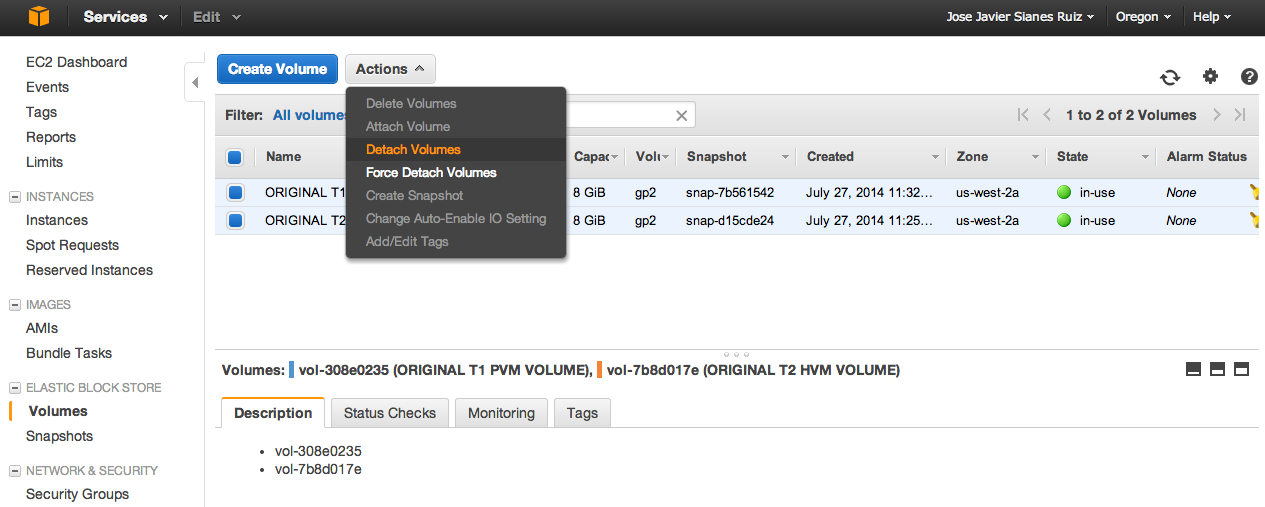
Stop both instances. Now, go to AWS EC2 web console, Volumes section and:
- Set an easy-to-remember name for each volume
- Review attachment information of T2 HVM root volume (at least) and take note of device name. In my example: /dev/xvda. We'll need this information later.
- Detach both root volumes
After these steps, both volumes should be available in AWS console:

Now, we need to launch a new instance. We'll use this instance to perform required changes, so work instance seems a good name. Don't forget to launch this new instance in the same availability zone of T1 and T2 instances:
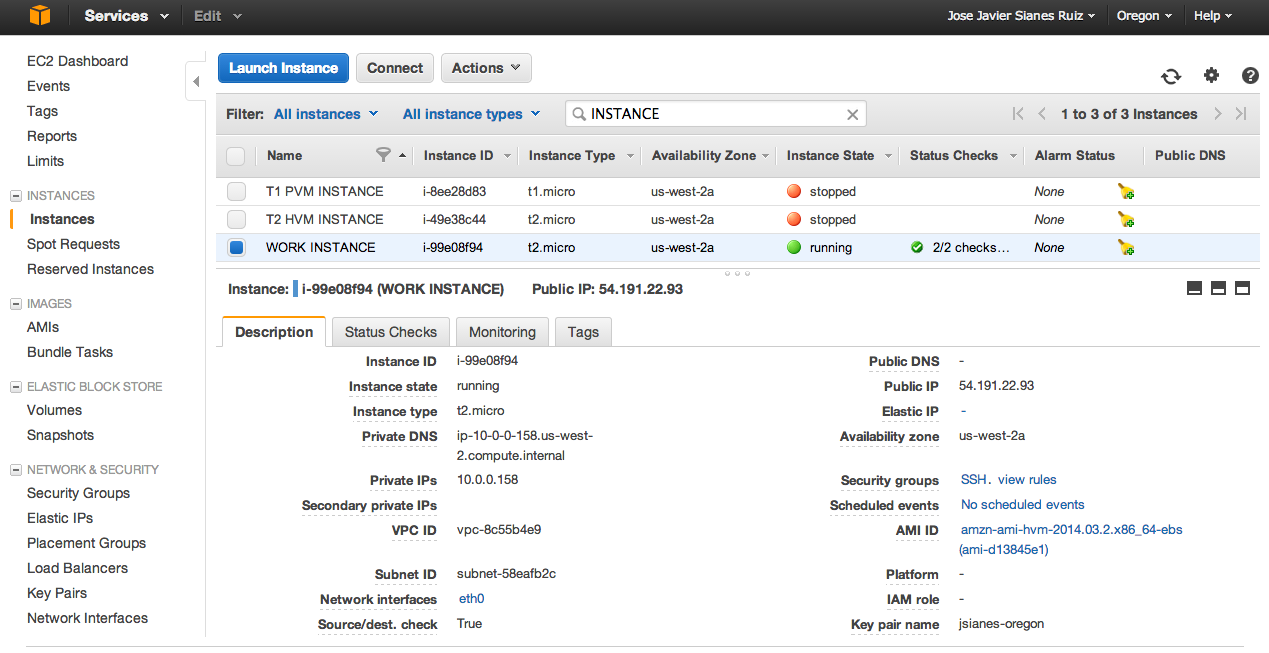
Attach T1 PVM and T2 HVM volumes as secondary volumes in work instance:
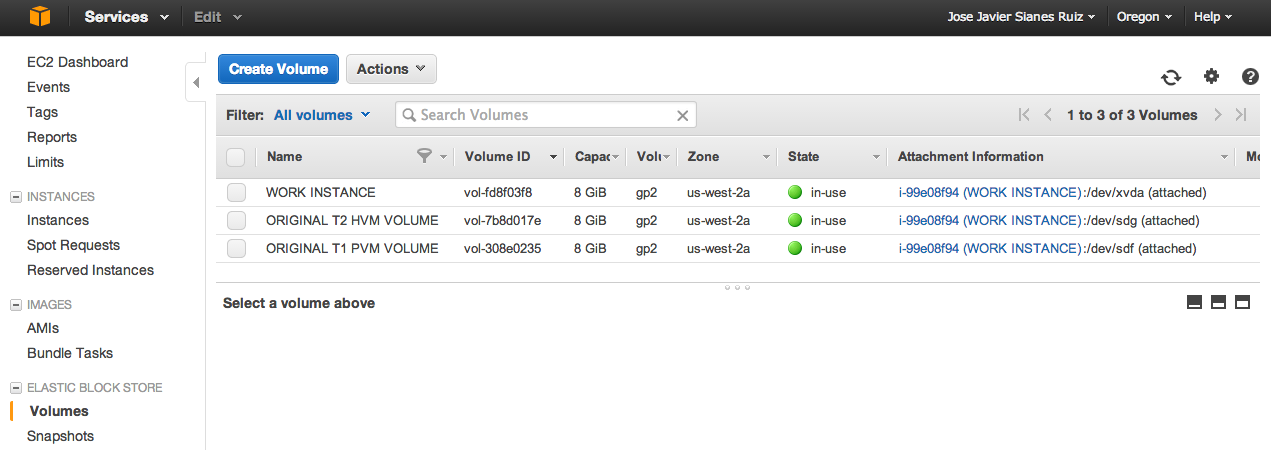
As you can see, T1 PVM volumes has been attached in /dev/sdf device and T2 HVM volume in /dev/sdg device. This information is important because will help us to identify volumes inside work instance.
Now, login to the work instance and run dmesg command to know how volumes are identified by the kernel:

According to dmesg information, /dev/sdf (PVM volume) is associated to /dev/xvdf and /dev/sdg (HVM volume) to /dev/xvdg1. Create two mountpoint directories, one for each device, and mount them. Required commands:
- sudo mkdir /pvm
- sudo mkdir /hvm
- sudo mount /dev/xvdf /pvm
- sudo mount /dev/xvdg1 /hvm
In the next step we're going to backup current HVM kernel. To ensure maximum compatibility, preserve current HVM kernel is recommended. You can skip this step if you're 100% sure PVM kernel will work with the new T2 HVM instance. You will need to backup /boot directory inside /hvm and modules associated to the running kernel. To know what is the active kernel, review /hvm/boot/grub/menu.lst file. Will give you the information to know what modules are required to backup:
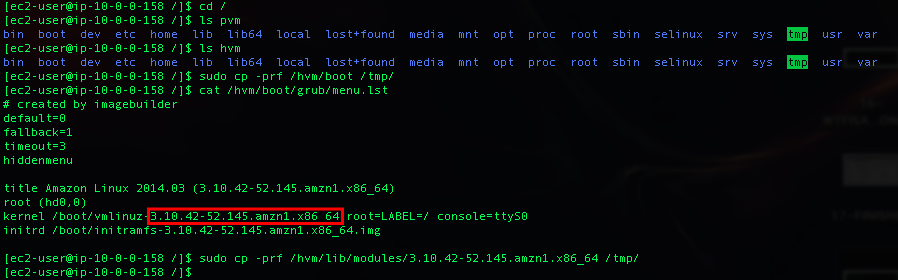
For our example, next commands will be required:
- sudo cp -prf /hvm/boot /tmp/
- cat /hvm/boot/grub/menu.lst . Active kernel is tagged 3.10.42-52.145.amzn1.x86_64. So, command to backup modules will be:
- sudo cp -prf /hvm/lib/modules/3.10.42-52.145.amzn1.x86_64 /tmp/
Next steps will be: remove all files from HVM volume, copy files from PVM volume to HVM and restore HVM kernel. The commands:
- sudo rm -rf /hvm/*
- sudo cp -prf /pvm/* /hvm/
- sudo rm -rf /hvm/boot
- sudo cp -prf /tmp/boot /hvm/
- sudo cp -prf /tmp/3.10.42-52.145.amzn1.x86_64/ /hvm/lib/modules/
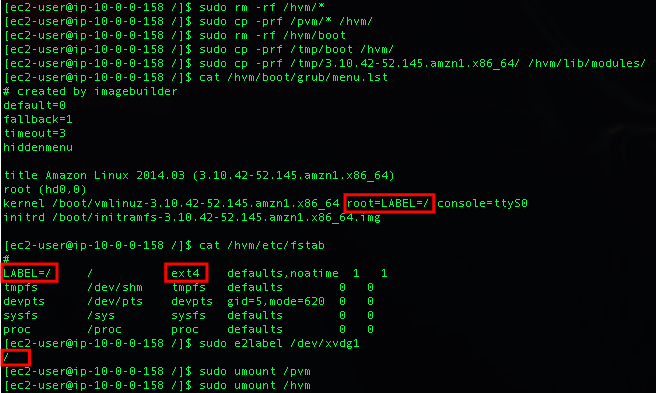
Important: review root label in kernel configuration, fstab file and root filesystem. In order to work, they need to be the same. In previous screenshot, volume labeled as / will be use as root device by kernel configuration and fstab file. Requesting information about HVM volume label, I get the same value. Finally, HVM volume filesystem is ext4. So, nothing additional is required in my example. If you find differences in your environment, you'll need to modify /hvm/boot/grub/menu.lst, /hvm/etc/fstab and/or HVM volume label to solve it. Otherwise, instance start-up will fail.
If all is correct, umount both volumes:
- sudo umount /pvm
- sudo umount /hvm
Go to AWS EC2 web console, Volumes section, and detach both secondary volumes (T1 PVM and T2 HVM volumes) from work instance.
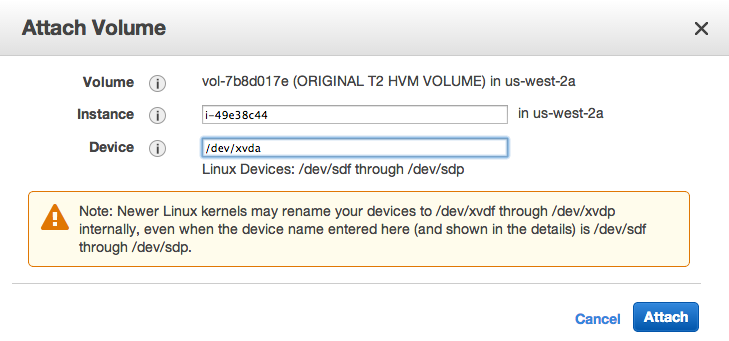
Now, attach HVM volume as T2 instance root volume. In AWS EC2 web console, Volumes section (Important: don't forget to put as device name the value you copied previously. In my example: /dev/xvda):
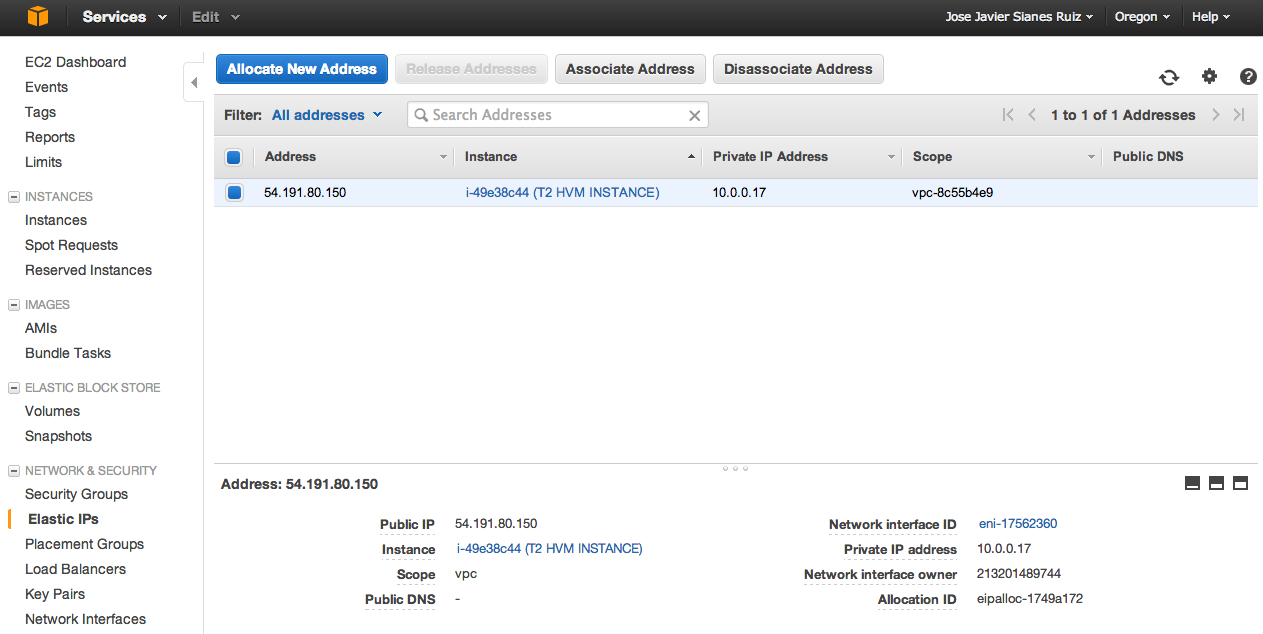
Optional: If T1 instance has an Elastic IP assigned, I suggest you to associate this IP to the new T2 instance. To do it, just disassociate Elastic IP from T1 instance and associate to the new T2 instance in Elastic IPs section. Example:


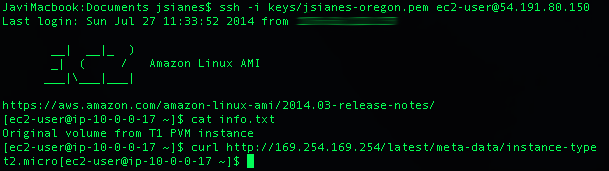
All done. Now you can start and login to the new T2 instance using the old Elastic IP. As you can see in the next screenshot, files contained are the same T1 PVM root volume, but using the new T2 instance type:
If after procedure you experience issues during T2 instance start-up, in AWS EC2 web console select the instance, right click and select Get System Log. If there is any issue associated to the kernel, filesystem or volume label; useful information for troubleshooting will be displayed here.
When all work as expected, you can remove old T1 and work instance. Be sure you won't need them before remove because as soon as you delete them won't be able to access again.